Actually, just one Canadian. But still!

I couldn’t go outside last weekend to film a video because it was ridiculously hot (nearly 40°C or 104°F) and if the camera didn’t melt, then I surely would. This weekend was quite a bit nicer, though, at only about 25°C. Beautiful weather, and perfect for deck time!

But lemme say, holy crud. I never realized trumpet vine flowers would be quite so big! They’re probably about three or four inches long and an inch wide, and a beautiful tangerine orange. This is the first year it’s flowered.

Alas, we’ve run out of cherries and strawberries, but the raspberries are still going strong. We’ve got a pumpkin that’s about a foot in diameter, too! Lots of zucchini and straightneck squash on the way, and we’ve still got rhubarb coming out our ears.

Also, rhubarb brownies are AMAZING. Basically, take a recipe like this and switch the zucchini for rhubarb. Oh man. So good. You end up with the sweet ‘n’ sour of the rhubarb mixing with the chocolate and it just makes things mmmmmmmmm. Give it a try!
Lesson one: pick cherries earlier next year.

Well, in my defense, I wasn’t there last weekend to pick the cherries, but by the time I did get there to pick them, they were somewhat overripe. So, as a note to myself (and my parents), we should probably pick our cherries at the start of July next year, instead of waiting any longer.

But that’s alright! The ones we did get were used to make a birthday cake for Mom. It was black forest cake, which means we made a double-layer chocolate cake with homemade cherry pie filling and frosting in the middle, and then we topped it with more cherry filling and frosting. Oh man, it was good, let me tell you. I would totally make that again.

Also, I’m sorry that the video is in two parts. I accidentally hit the “stop” button mid-video, and then I couldn’t get any movie-editing programs to stick them together without losing the video or having it lock up. And I don’t think it’s an issue with my computer, because I tried it on two different computers and the exact same thing happened, so I think it must be something with the way this camcorder saves the files. I’m not sure. Either way, you’re stuck with two videos. I tried to fix it. Really!


So, here’s what happened:

Triplets! How cute!

Triplets! How cute!

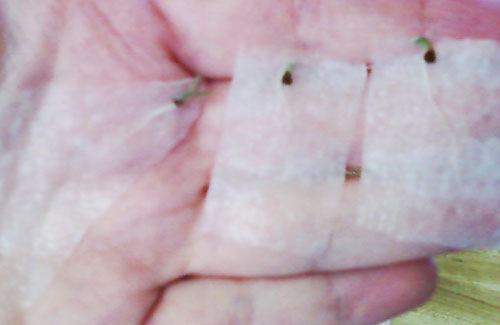
It started off normally. My little ziploc-baggie-seed-starter things got a few of the seeds to germinate! You saw that in my last post about this, which was 8 days ago, in which I flailed my little Canadian head off about the plan actually working. So, here are those three seedlings, all popped out of their seeds and happily green! Things were totally great.

Then, fast forward to a couple days later:

So many babies!

So many babies!

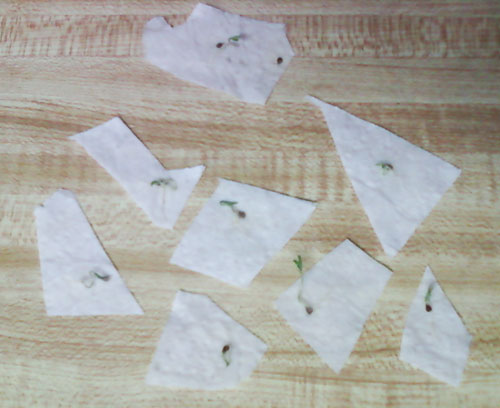
Even more babies! Look, now there’s eight of them! I was thinking, “Boy! I’m gonna have a couple of tomato plants to share with Dad, even! He’ll be so pleased!”

Little did I know that this would spawn into a horror of untold proportions. My seeds kept multiplying. There were more. And more. And more. “But I only took seeds from a single, tiny tomato!” I cried in abject terror, sinking to my knees and sobbing. “Why is this happening to me!?”

The tomatoes surrounded me then, pressing in from all sides until– okay, no, obviously I’m still here and still alive, but this is seriously turning into a horror story. Look:

This slideshow requires JavaScript.

I have so many tomato plants now, I don’t even know what to do with them all. I AM RUNNING OUT OF POTS. My main hope is that they’ll run out of growing season before they get truly massive and I can just take the healthiest ones inside and sacrifice the rest to Cthulhu to ensure good harvest next year. I seriously did not think that 21 out of 25 seeds would sprout. The only reason the last four didn’t is because I DESTROYED THEM WITH A VENGEANCE before they could. Or maybe I just threw them in the garbage. That could be, too. I have no more room for more sprouts.

So, lesson of the week? Don’t put 25 tomato seeds on paper towel and stick them in a baggie, because they will all grow and you will regret it.

I’m so sorry. I was going to give this to you guys on the weekend and I totally got distracted by friends. Stupid friends. (I LOVE YOU, FRIENDS.)

So, I’m going to give it to you now! It’s a short video (I think) on how Dad and I made our own floating pond planters from some instructions we found online. Incidentally, those instructions are here.

We made our own little tweaks and improvised on whatever parts didn’t actually HAVE instructions, so it’s got a little bit of our own take on things.

Anyway, the point of floating pond planters is to have plants with water roots that grow right into your pond. The plants take the nutrients out of the pond, thus cleaning it, and keeping your fish happy! Plus, you get to grow plants for NOTHIN’. Obviously, you don’t even have to water them. You can grow things like flowers, or you can grow herbs, vegetables, and just about anything else, so long as it’s not too tall. You don’t want to tip your floating planter over in a strong wind, right?

So, have a gander!


Here are the ingredients:

1. 1.5″- to 2″-thick styrofoam. The one we had was 14″ wide and 1.5″ thick and probably something on the order of 5′ long, but don’t worry about that bit. You need something you can cut circles out of (or squares, or whatever shape you want to make your planter). You can also buy pre-made styrofoam shapes, if you don’t feel artsy today.

2. Coco mat (coconut husk) planter liner. Your choice of size and shape! Just remember that it should be fairly deep.

3. Pea gravel (basically, small, smoothish rocks to serve as your “soil”).

4. Zip ties (or screws, as shown on that forum).

5. Netting (Optional. We used this to give support to the coco mat).

6. Decorations (Also optional. Gives a nice touch to it, though!)

7. Plants (Decidedly not optional.)

YOU GUYS. YOU GUYS. YOU GUYS. GUESS WHAT? 

IT WORKED.

It worked. Fermenting the tomato seeds and putting them on wet paper towel inside a Ziploc bag? Totally freakin’ worked.

I swear this is a root.

I swear this is a root.

Okay, so that isn’t much to look at, but that’s only because I had one seed with a half-inch root and I got so excited that I forgot to take a picture of it before I planted it. I am sorry. Very, truly, deeply sorry. This is what happens when I get excited. I rush ahead and I totally forget “pics or it didn’t happen”. 

Well, I kind of have pics. That little white blip in front of that blurry seed? That’s the start of a root. I’ve got another couple of them with roots, too, but they’re even harder to see. Off-white on off-white in tiny scales with a phone-camera doesn’t work so well. But, when they get bigger and more visible and there’s definitive proof, I will take another photo. …If I remember.

Point is, the plan worked!

It turned into a seed. A harmless little seed. And then I put that seed in a box, and I put that box inside of another box, and then I mailed that box to — no, wait. I’m getting mixed up.

I put that seed in a pot. That’s right. I remember now. I tore off the chunk of paper towel that had the root on it and I put the seed, paper towel and all, into some soil, gave it lots of water, and put it outside! I’ll have to see if it actually grows any leafy bits!

As for the rest of my outdoorsy plants (who are much more outdoorsy than I am these days due to extreme heat), they’re also doing really good:

This slideshow requires JavaScript.

Well, this would have been uploaded on the weekend, but my power went out yesterday (on Canada Day, nonetheless, with 37°C temperatures), so I nearly shriveled up like a raisin and perished.

Luckily, the power eventually came back, along with my air conditioning, so my house is now down to 25°C instead of 32°C. Tell me tell you, that is an important difference.

But anyway! Dad’s garden has undergone an explosion of fruit! This weekend, we picked bucketfuls of strawberries and cherries, and a few raspberries, too! We made pies, or had them with ice cream. Absolutely delicious. Those totem strawberries are amazingly sweet! I think all the sun we had this weekend helped, for sure.

Current Weather: 23°C (73°F), overcast, breezy

My tomato seeds FINALLY finished rotting today, so I took them out of the jar and cleaned them up. I’m not sure why they took as long as they did. Could be I put a little too much water in the jar, could be I didn’t have enough tomato stuff in there to start with, could be the fact that it’s been ridiculously rainy here (so no hot places for a rotting jar of ick to sit) despite the fact that this is supposed to be a semi-desert.

In any event, I checked on them again today, and I could see that the little clear casings that each seed was embedded in had … disappeared. Dissolved? Probably dissolved, although it is possible that little, microscopic elves sneaked in during the night and chipped away at it with tiny shovels.

I took the jar downstairs, filled it up with water again, and swished everything around. Yes, it was gross. No, I didn’t take pictures. Once I’d gotten all of the gunk out of it and generally had the seeds left, I started picking them out with tweezers because I don’t have anything fine enough to sift out tomato seeds. Then, I put them onto a paper towel, spaced out, and gave them a little bit of water, and sealed them inside a plastic bag:

We are family! I got all my sisters with me!

We are family! I got all my sisters with me!

Now, I have to wait again to see if they’ll go ahead and sprout roots. Hopefully that will not take another forever.

Today, it’s a short update on my plants, and then I launch into a little tutorial of how to harvest the seeds in your tomatoes in order to plant them again next year!

I snagged this information from About.com. That link has handy step-by-step stuff, plus some pictures.

Anyway! Here’s the stuff you’re gonna need if you’re thinking about harvesting some seeds from your tomatoes:

1. Ripe tomato (obviously). It should be your best and brightest!
2. Bowl or glass jar (glass jar is preferred).
3. Paper towel or cheesecloth.
4. Knife (to cut your tomato).
5. Spoon (if your tomato can’t easily be “juiced”).
6. Little bit of water.
7. Elastic band.

And, for step 2 (which comes in about 3 or 4 days), you’ll need:

1. Spoon.
2. Plate.
3. Sieve or colander.
4. Seed container (paper sleeve, plastic bag, etc)
5. Sticky label and marker/pen.

Enjoy!


P.S.: I remembered the name of the plant immediately after I was done filming. It’s a cyclamen.

WELL, SILLY ME. I totally forgot to post this up on the weekend. That’s my bad.

Anyway, we’re about a third of the way through June and the strawberries are coming along nicely. They’ve all flowered and some of them have fruit that’s just starting to change color. So, I’m thinking, in a couple of weeks, we’ll be able to make strawberry-rhubarb pies! Yessssssss. The rhubarb is huge, too. You’ll be able to see my hand in comparison with one of the leaves. The thing totally dwarfs me. It’s, like, fifteen times bigger than my hand is.

The cherries and nectarines are doing well, too. They’re getting bigger, and we’ll probably be able to start harvesting them in early July, I’m thinking. Potentially. Longer for the nectarines, probably, but I’m excited. We never really got to eat any of them in previous years. I think last year, the bears came and ate them all. Hopefully now that we’ve got a dog again, we’ll be safe from that. I’d really like to get some fresh nectarines for my lunches!

As for the flower boxes, it looks like most of the plants survived. In the video, I show you the little drainage system we made for the one box. It dried out quite well after we put that in. Maybe we’ll have to actually water them for once. Ha ha ha ha ha.

Dad also bought three tomato plants, which we’ve planted in the back yard. He also got six of my peppers, two pumpkins, and Petey II. That’s right, a second bean sprouted! And then I gave him away. I’m sorry, Petey II. I swear, if there’s a Petey III, I’m keeping it.

Temperature: 29°C (84°F), partly cloudy, calm

Yesterday, I turned off my heating because, for once, it wasn’t rainy and cold. Now, it’s right back to nearly 30°. Spring weather is so unpredictable here sometimes. But, I suppose that’s true in a lot of places!

Today’s video isn’t so educational, but I did figure out what was wrong with my tomato plant. I’d noticed last week that it was turning yellow and seemed like it was dying, but now it’s recovering, growing new leaves, and it’s also ripened a bunch of tomatoes for me! I even remembered not to eat them before I filmed them. Plus, my cyclamen has put out a bunch of new shoots and my grape is getting greener.

All-in-all, I’ve managed to bring back three plants that were on the brink. I’m a little bit proud of myself!